
Step 1: Open up Onity Client located on the Start menu.

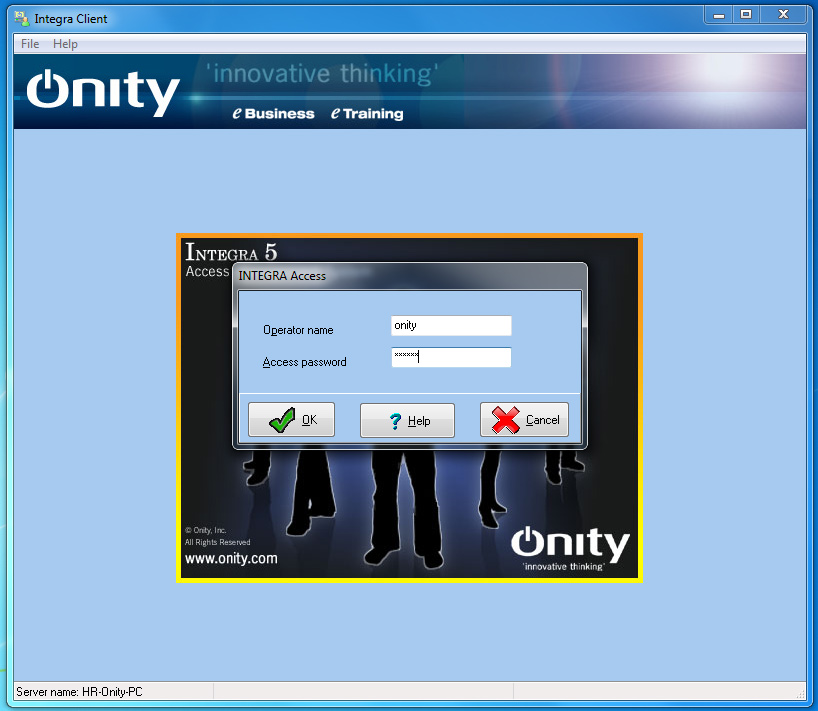
Step 2: Log into Onity.
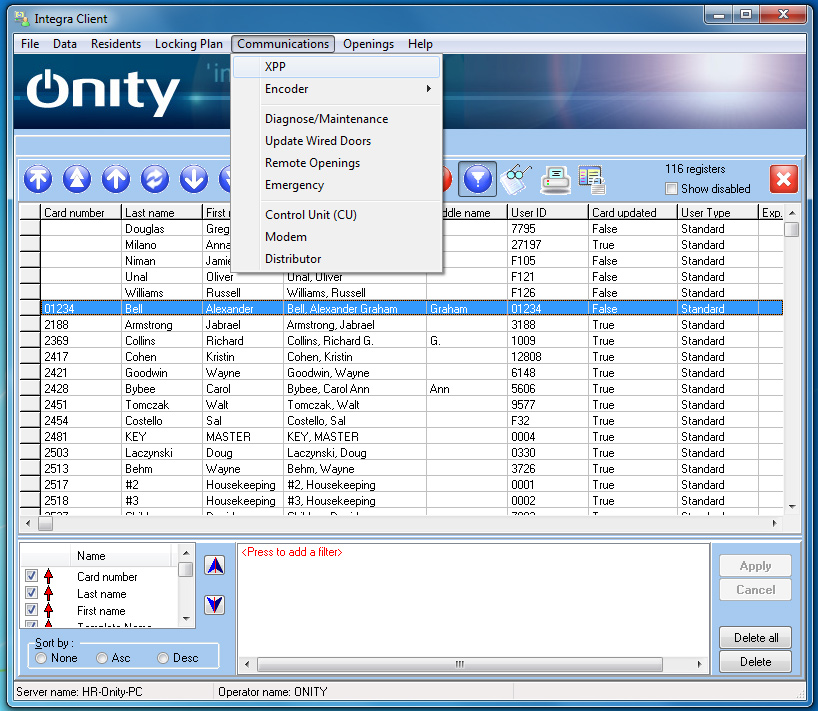
Step 3: Click on ‘Communications’ on the top menn, then click on XPP.
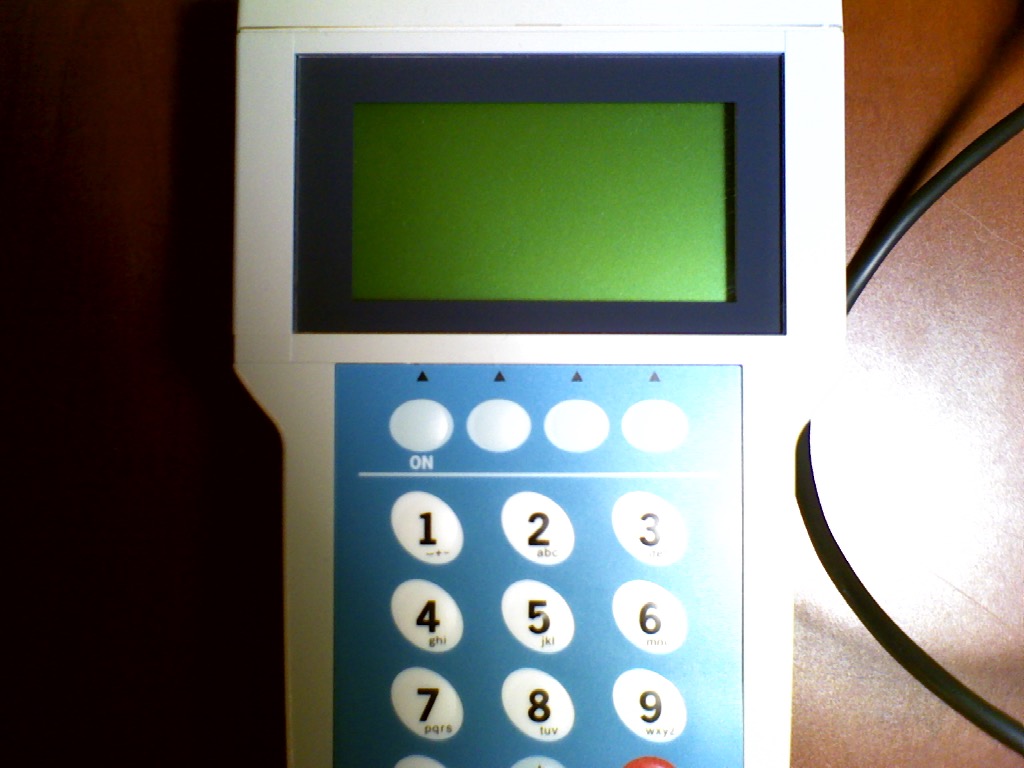
Step 4: Turn the hand programmer on.
Step 5: Once the programmer is on, click on connect on the computer screen
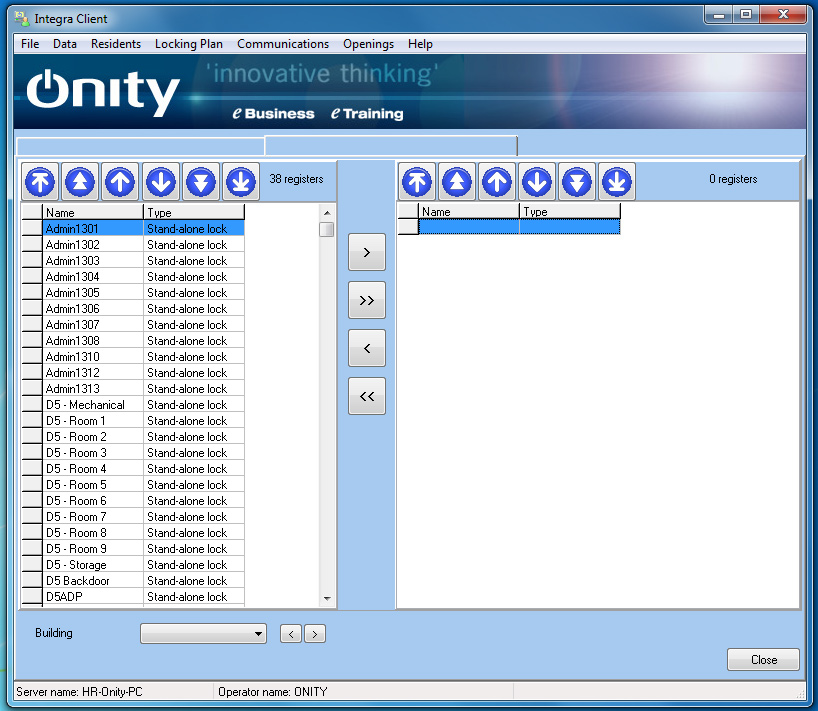
Step 6: Once it is connected, click on ‘Doors Selection’
Step 7: Select all the doors that need to be updated. Once all are selected click the > button, in the middle of the screen, to move the doors to the right. Once displayed on the right, click ‘Close’.
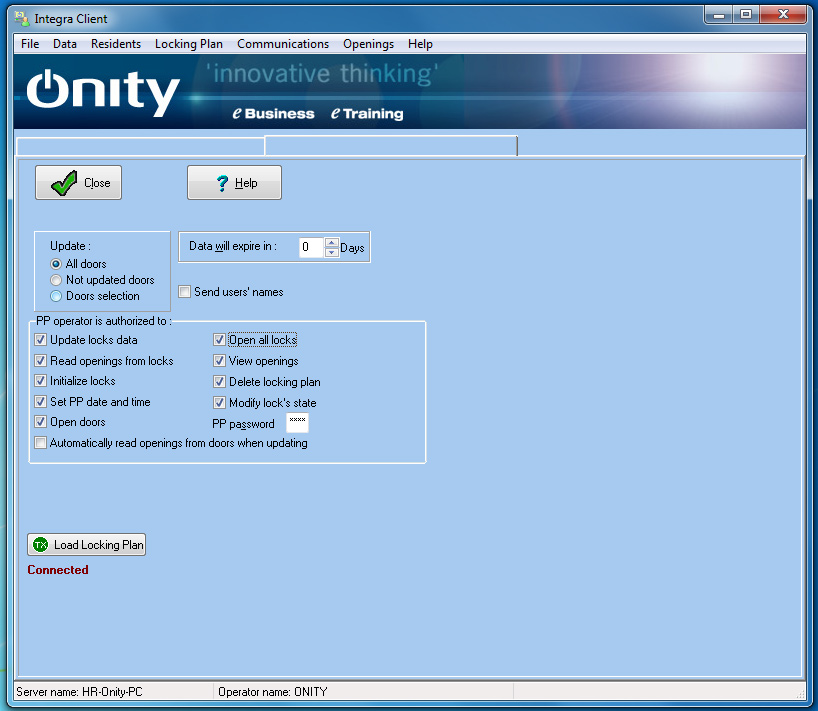
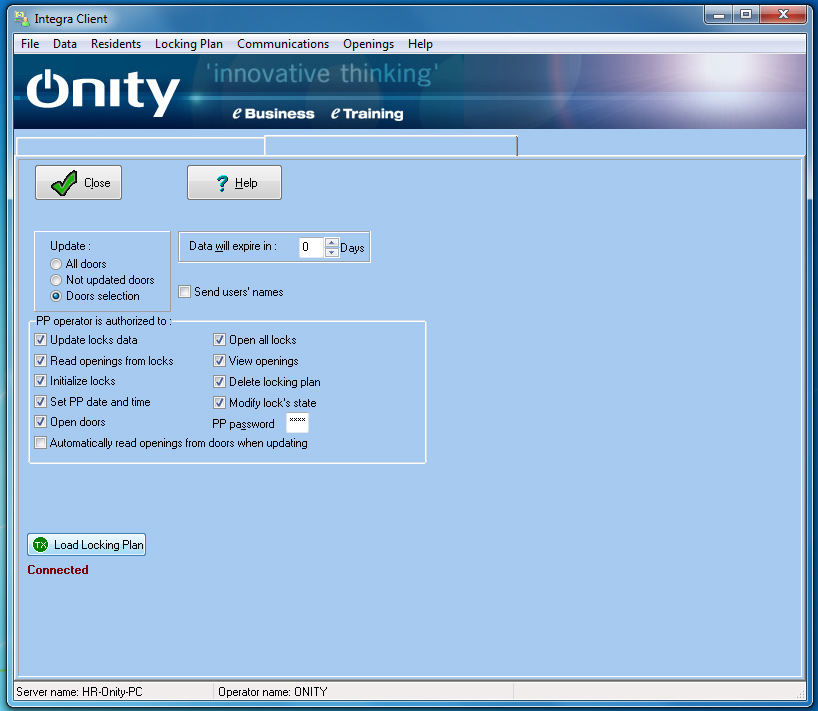
Step 8: Select everything under “PP Operator is authorized to”: EXCEPT “Automatically read…” Click on “‘Send users’ names”, and put date will expire on: ‘0’.
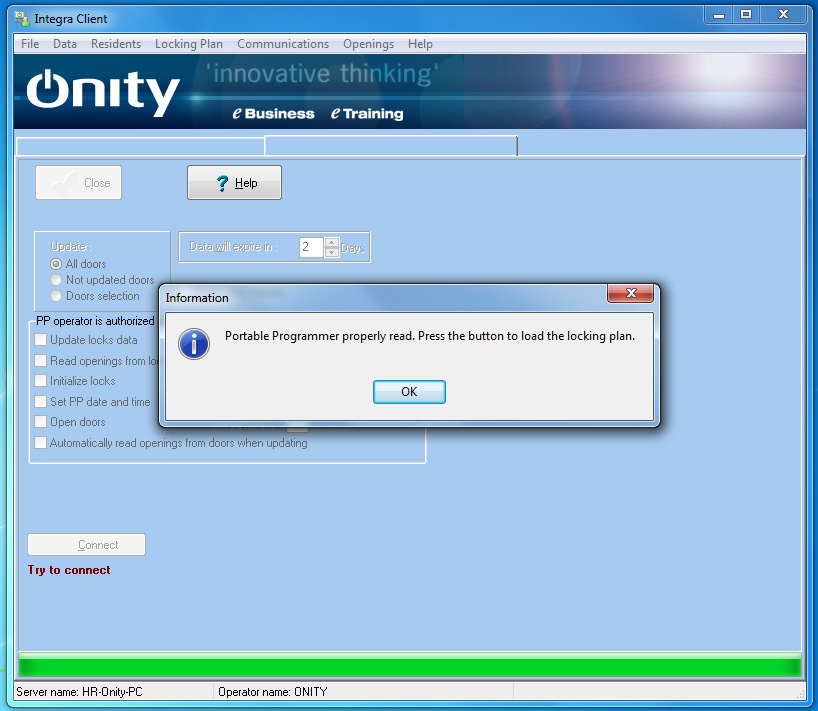
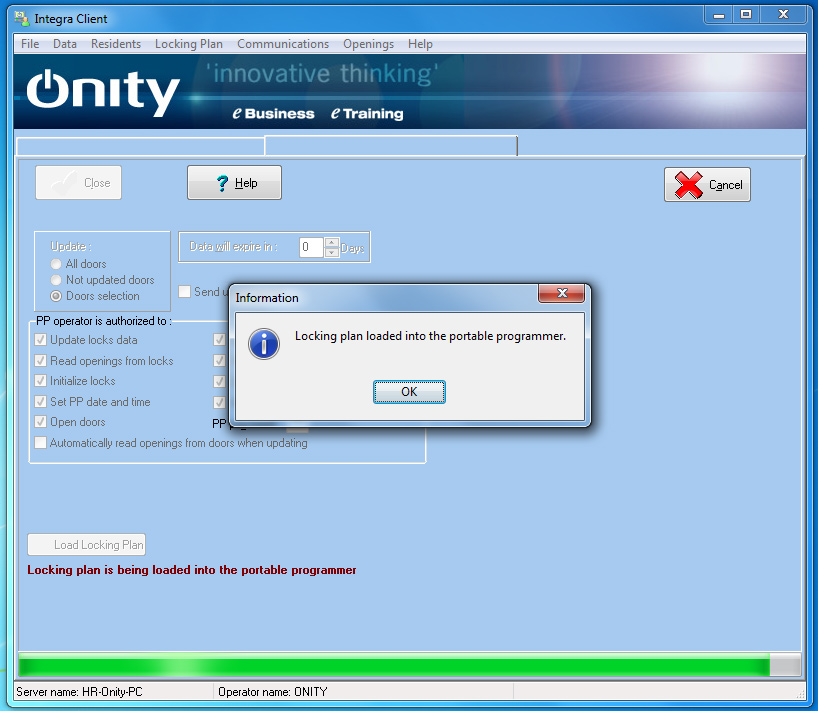
Step 9: Once all this has been complete click on ‘Load Locking Plan’.

Step 10: Once the programmer is loaded, unplug the ‘white’ cable from the Door Programmer.
Step 11: take to each door to program. Insert the black cable into the hole on the bottom of the door handle housing.
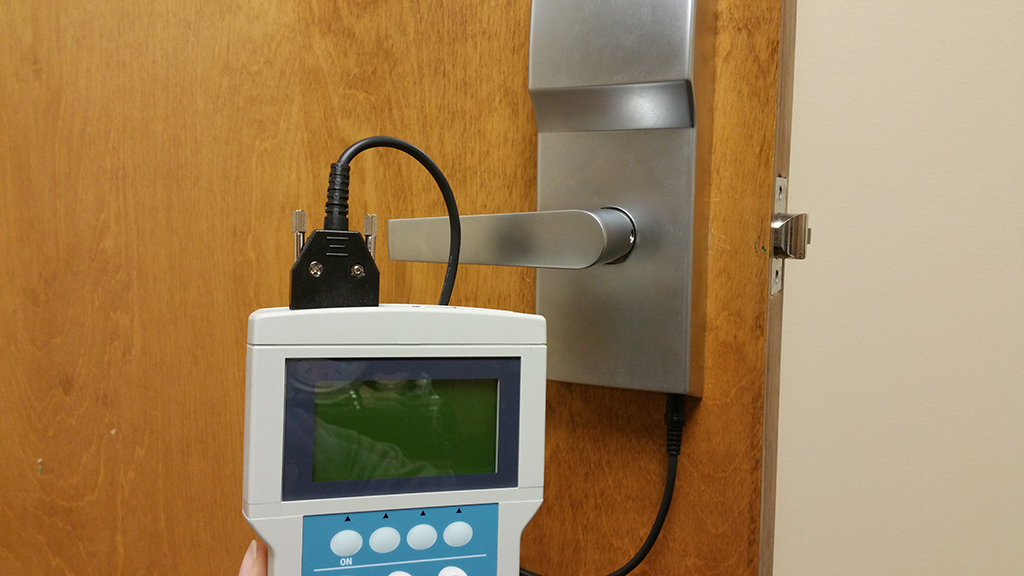
Step 12: Turn the programmer on.
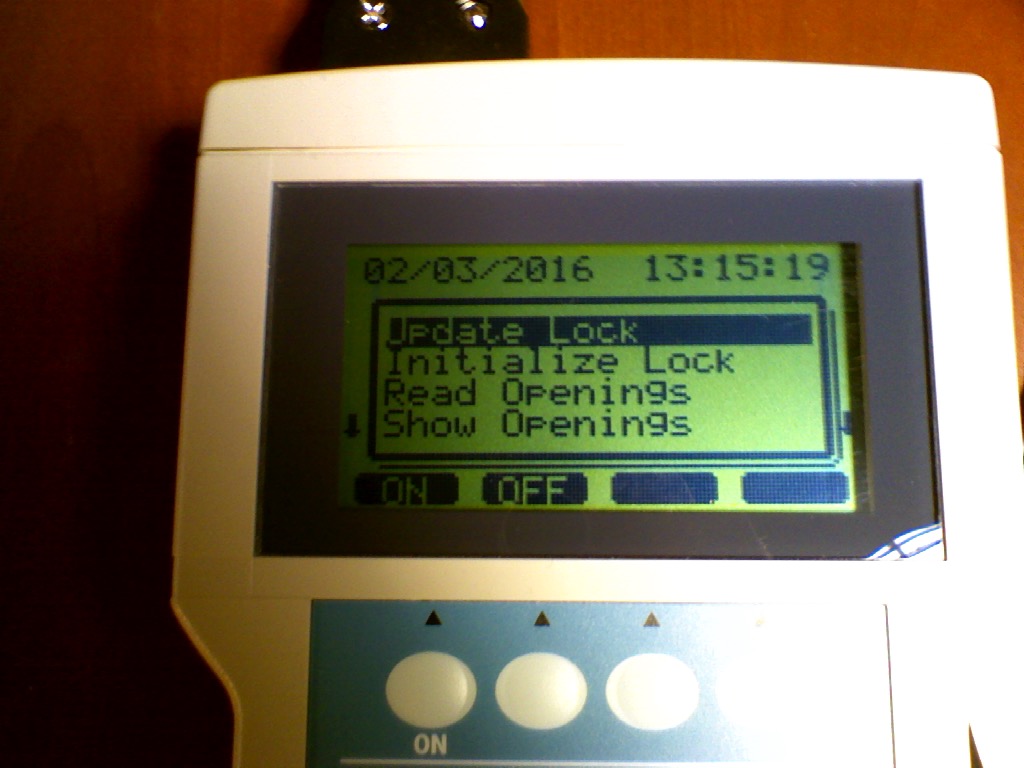
Step 13: Use the arrow buttons to select ‘Update Door Lock’
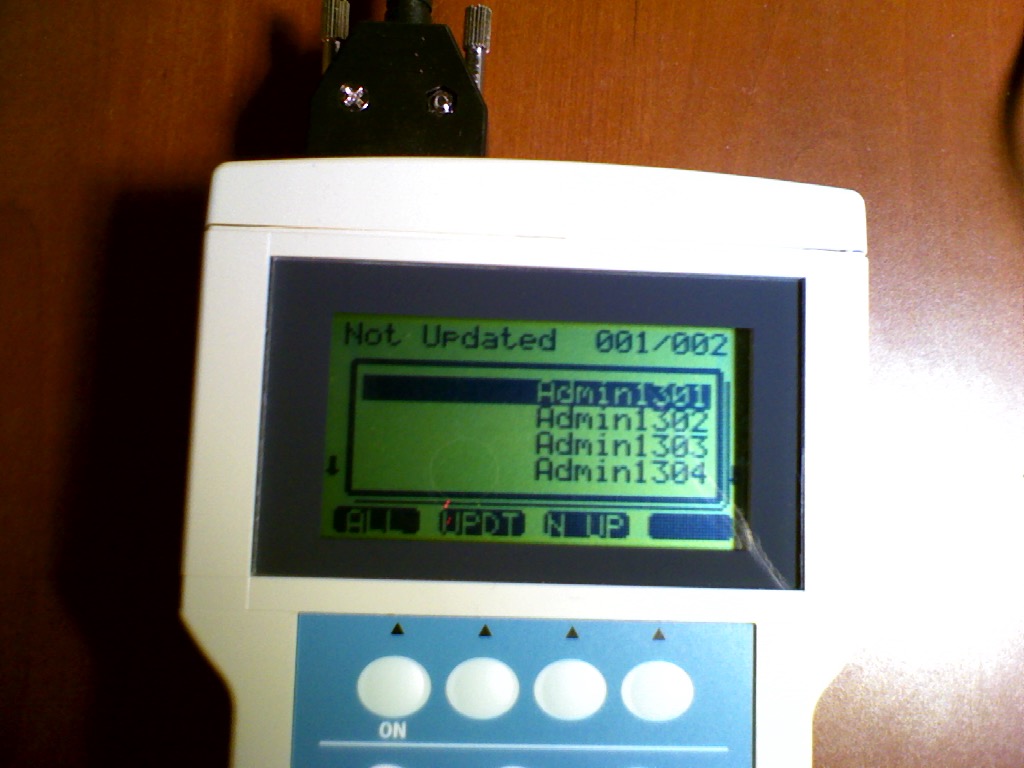
Step 14: Press Enter (As long as the door has been loaded it will program the correct door. No matter what door name you’re on).
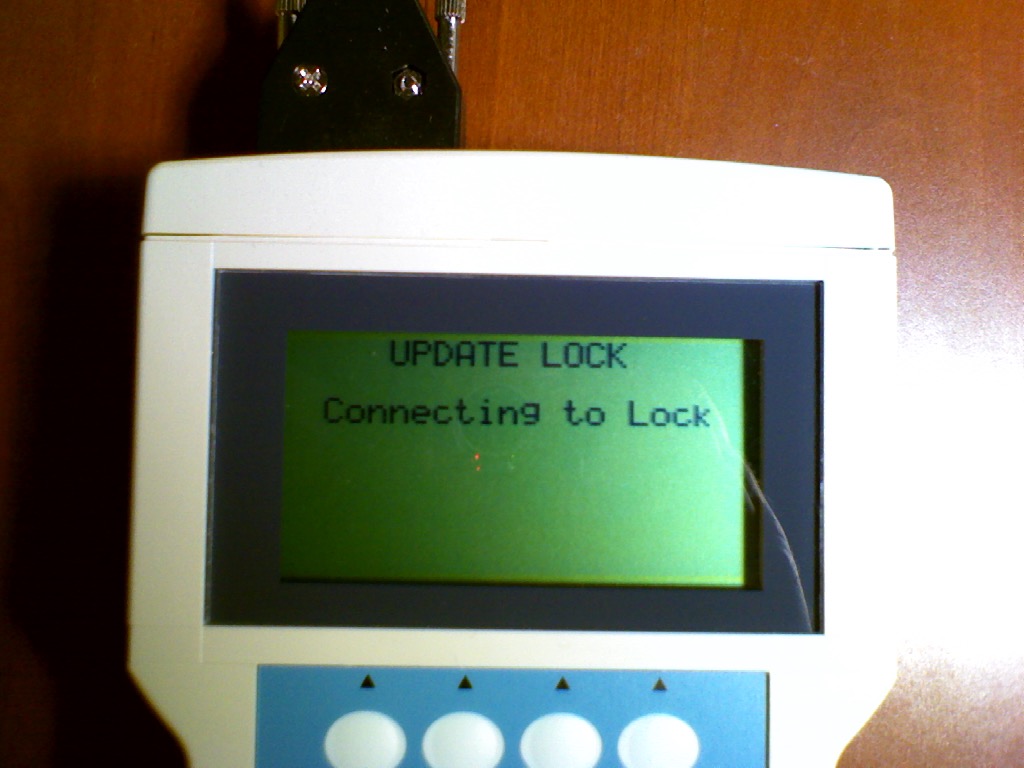
Step 15: The programmer will say “Connecting to Lock”, make a buzzing noise then it will ‘beep’ when it is complete. Proceed for each door to be programmed.
Step 16: Once all doors have been updated, make sure to plug the programmer back up after every use. it will keep the battery charged.