
Step 1: Open up Onity Client located on the Start menu.

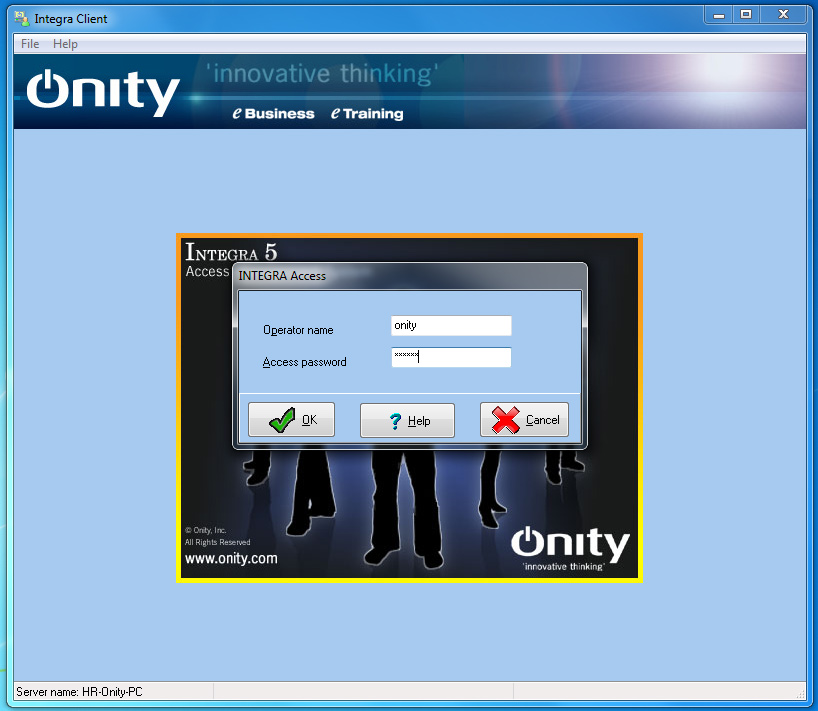
Step 2: Log into Onity.
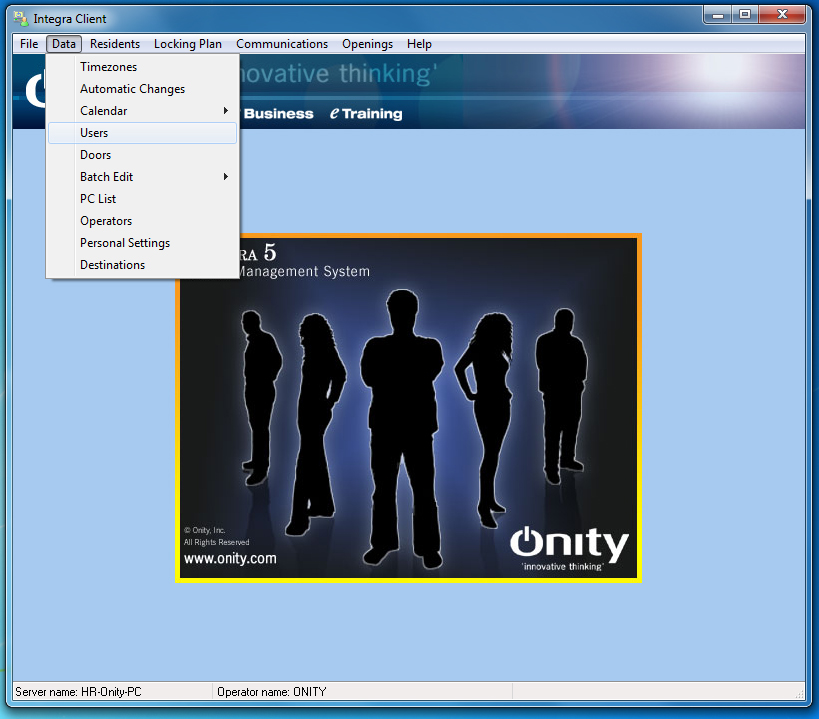
Step 3: Click Data, from the menu bar, then Users.
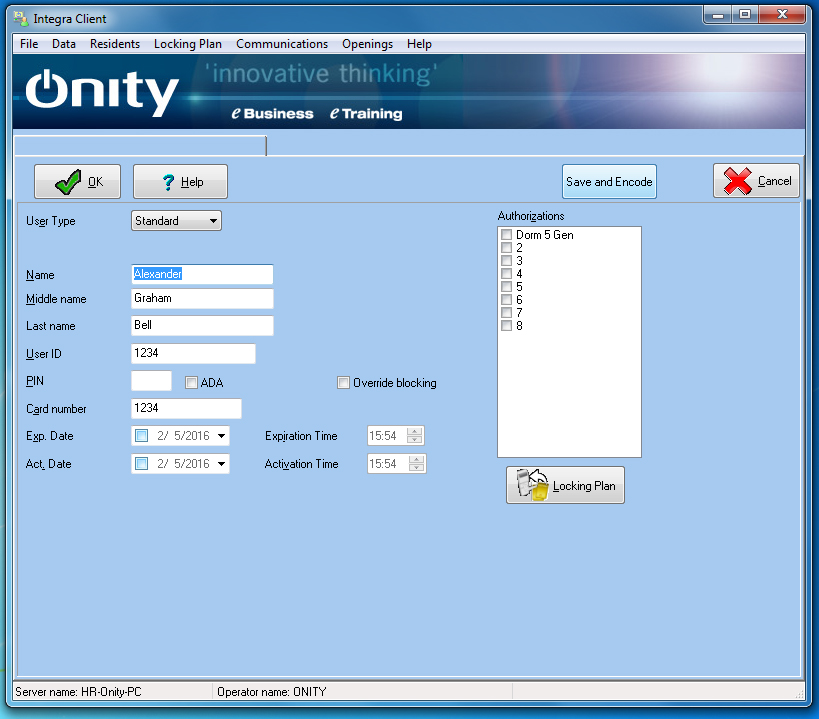
Step 4: Find the User you wish to modify and double click on said user.

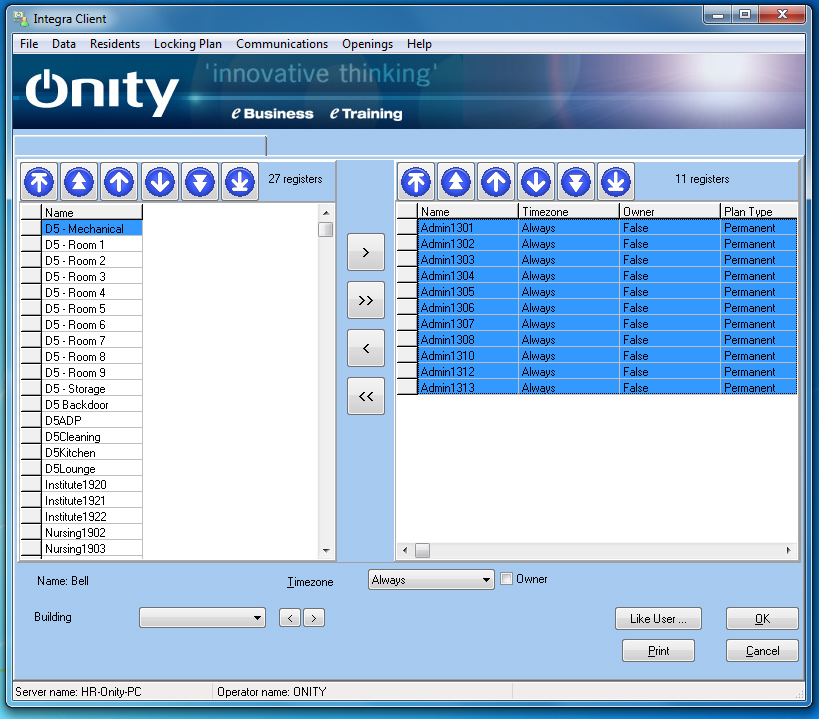
Step 5: Click on the “Locking Plan” button.

Step 6: Remove the door(s) from the right hand column by clicking the door(s), then click the < Button (in the middle of the screen).
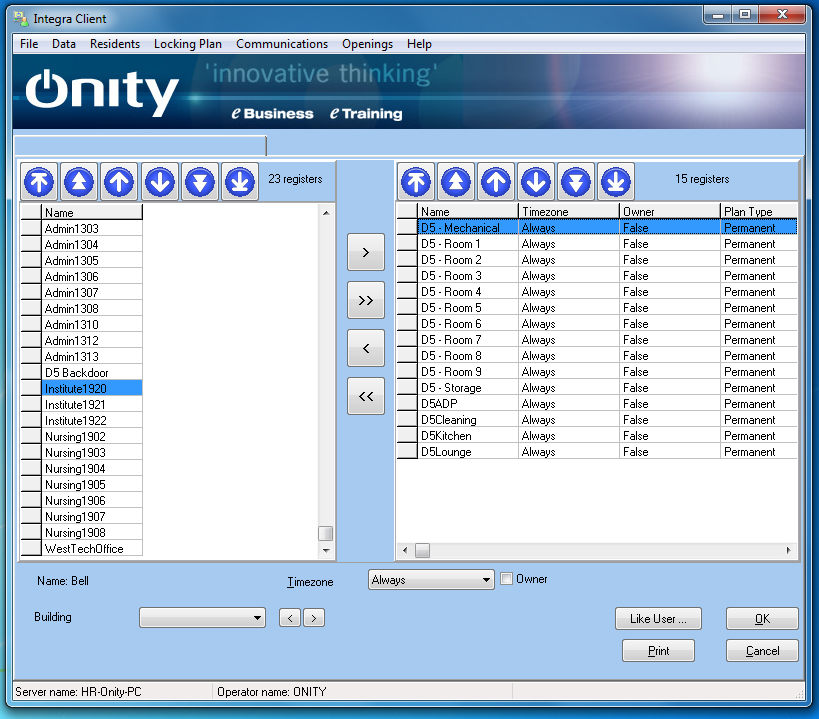
Step 7: After removing the doors, add the new door(s) from the left hand column by selecting the door(s), then clicking the > button (in the middle of the screen). Once done click the OK button.
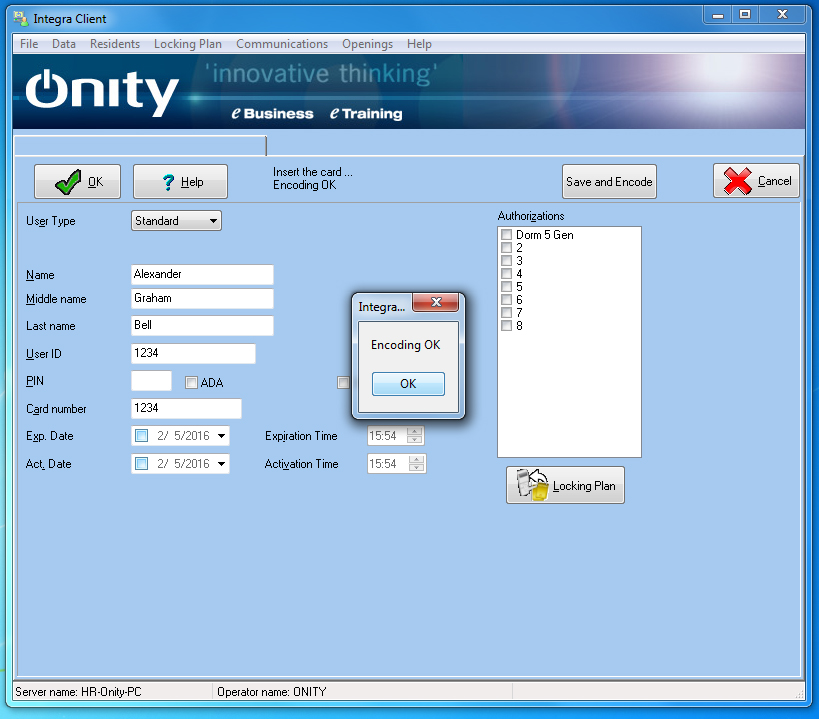
Step 8: Once you are back to the Individual Profile, click the Save and Encode Button. It will ask you to insert the card into the encoder, follow the instructions on screen.
Step 9: Once the card has been programmed, follow the steps found here Programing the XPP (Handheld Door Programmer). Begin at Step 3
***Make sure to program any doors that were added or removed from an ID. If you do not reprogram the doors then the ID will still open any doors it was previously authorized to open***